How to Add CNAME (DNS) records set-up on Name.com DNS Manager
Step 1: Go to Name.com and log in to your account.

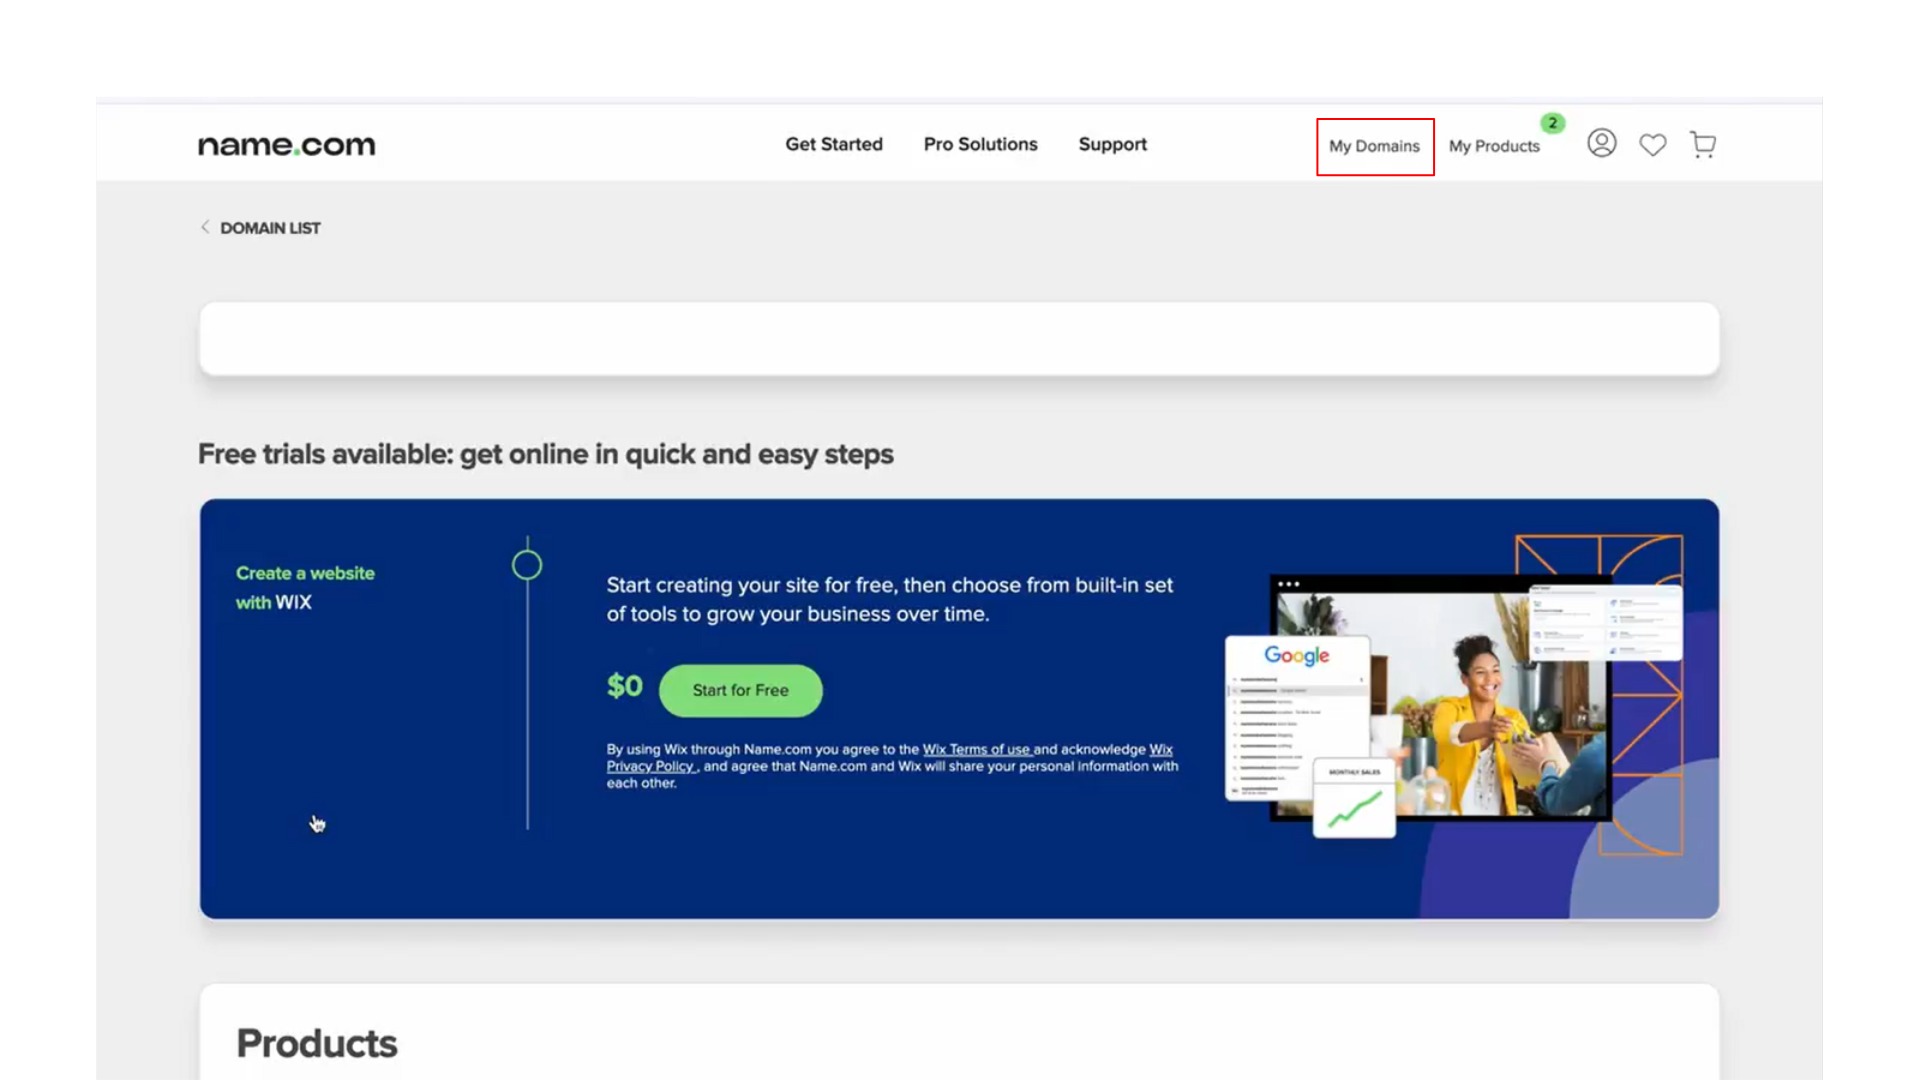
Step 2: Click on the MY DOMAINS link, located on the top right of the navigation.

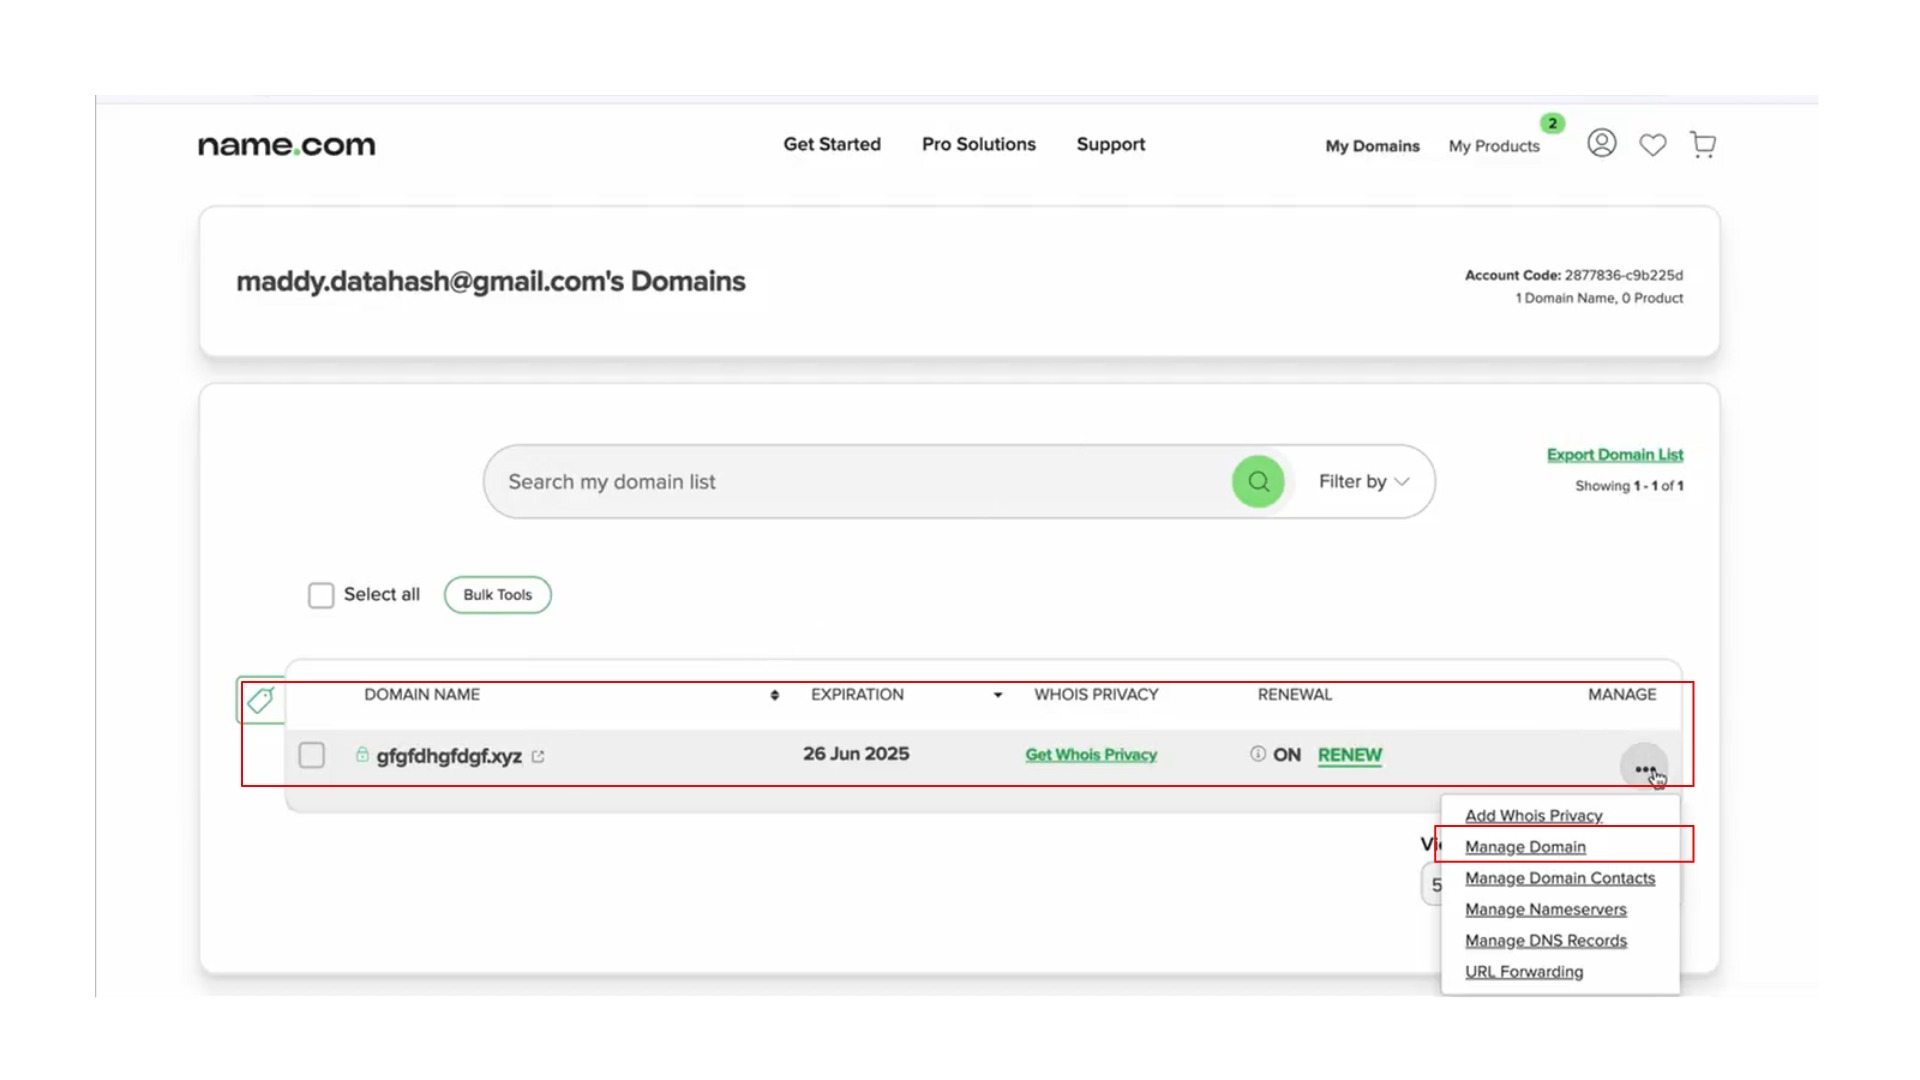
Step 3: Choose the domain where records are to be added. Click on Manage Domain of that Domain from its action button (3 dots).

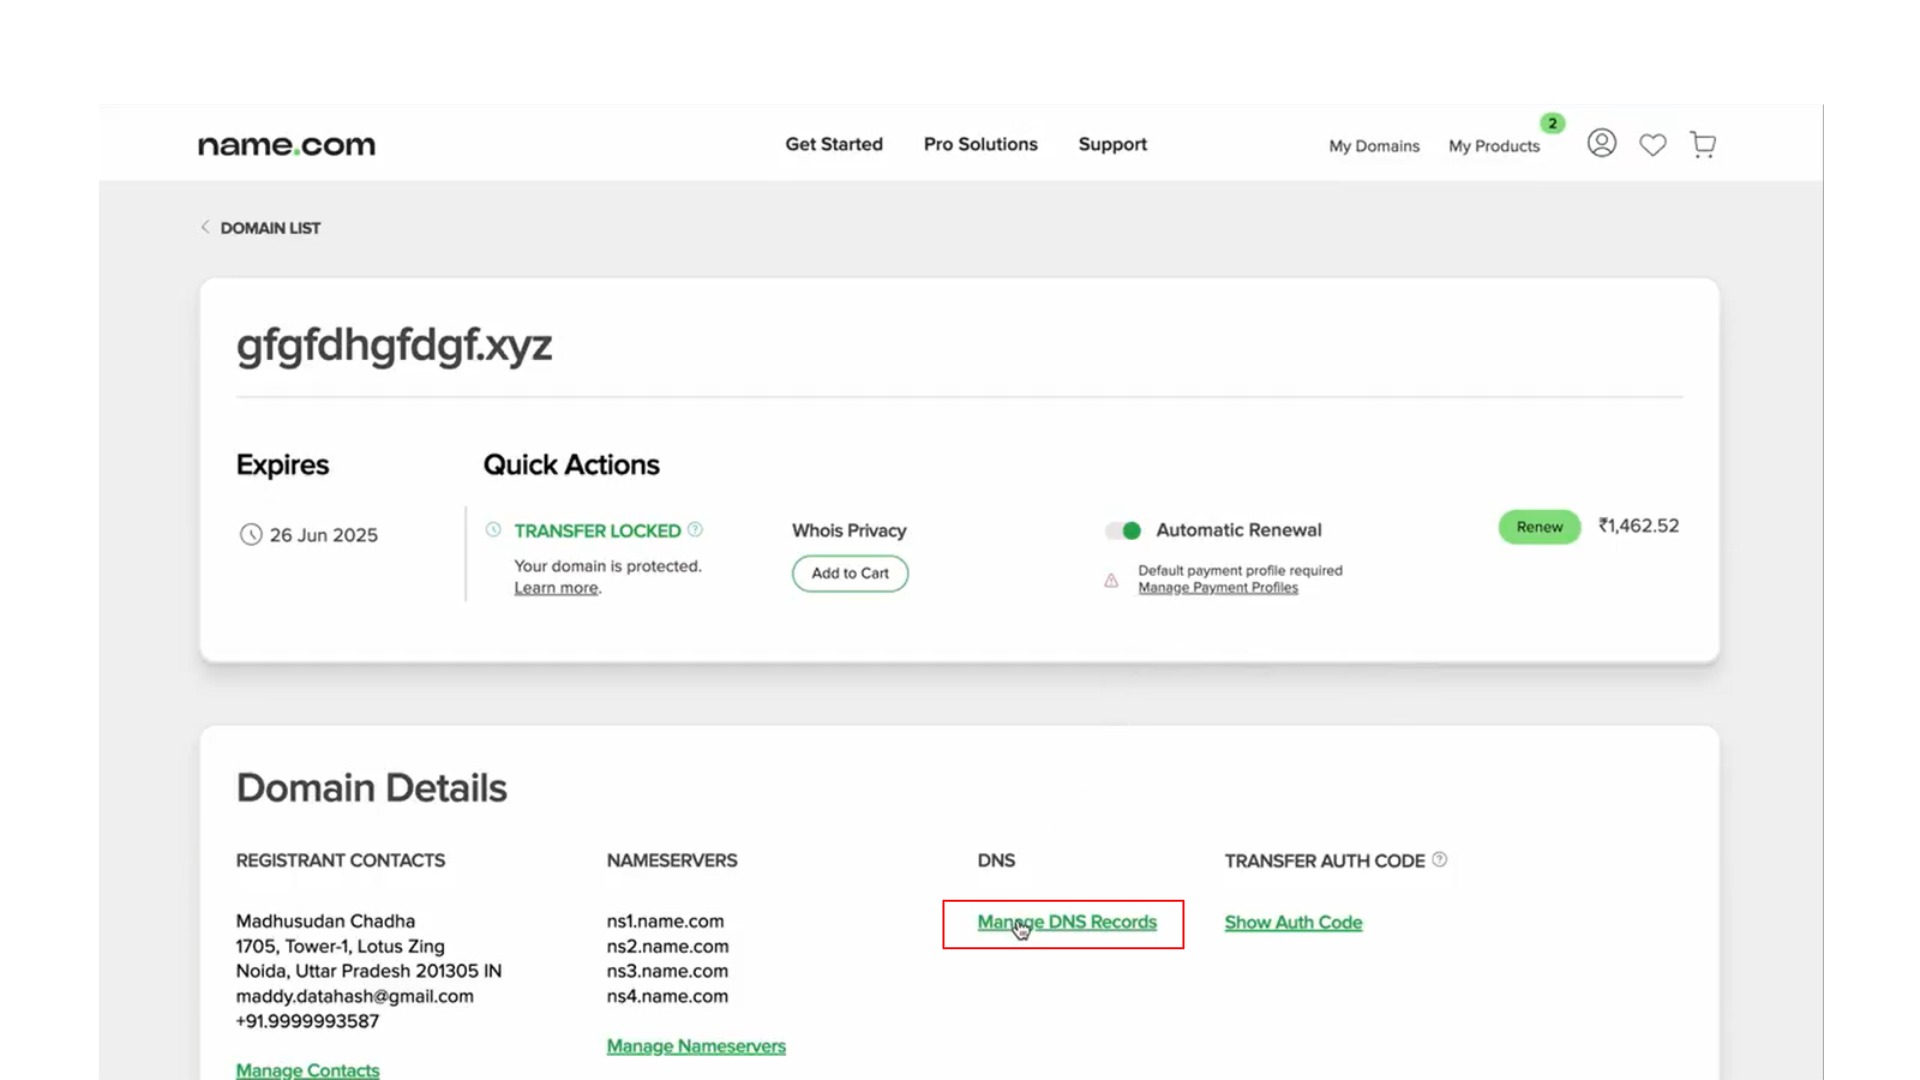
Step 4: Click on Manager DNS Records under DNS.

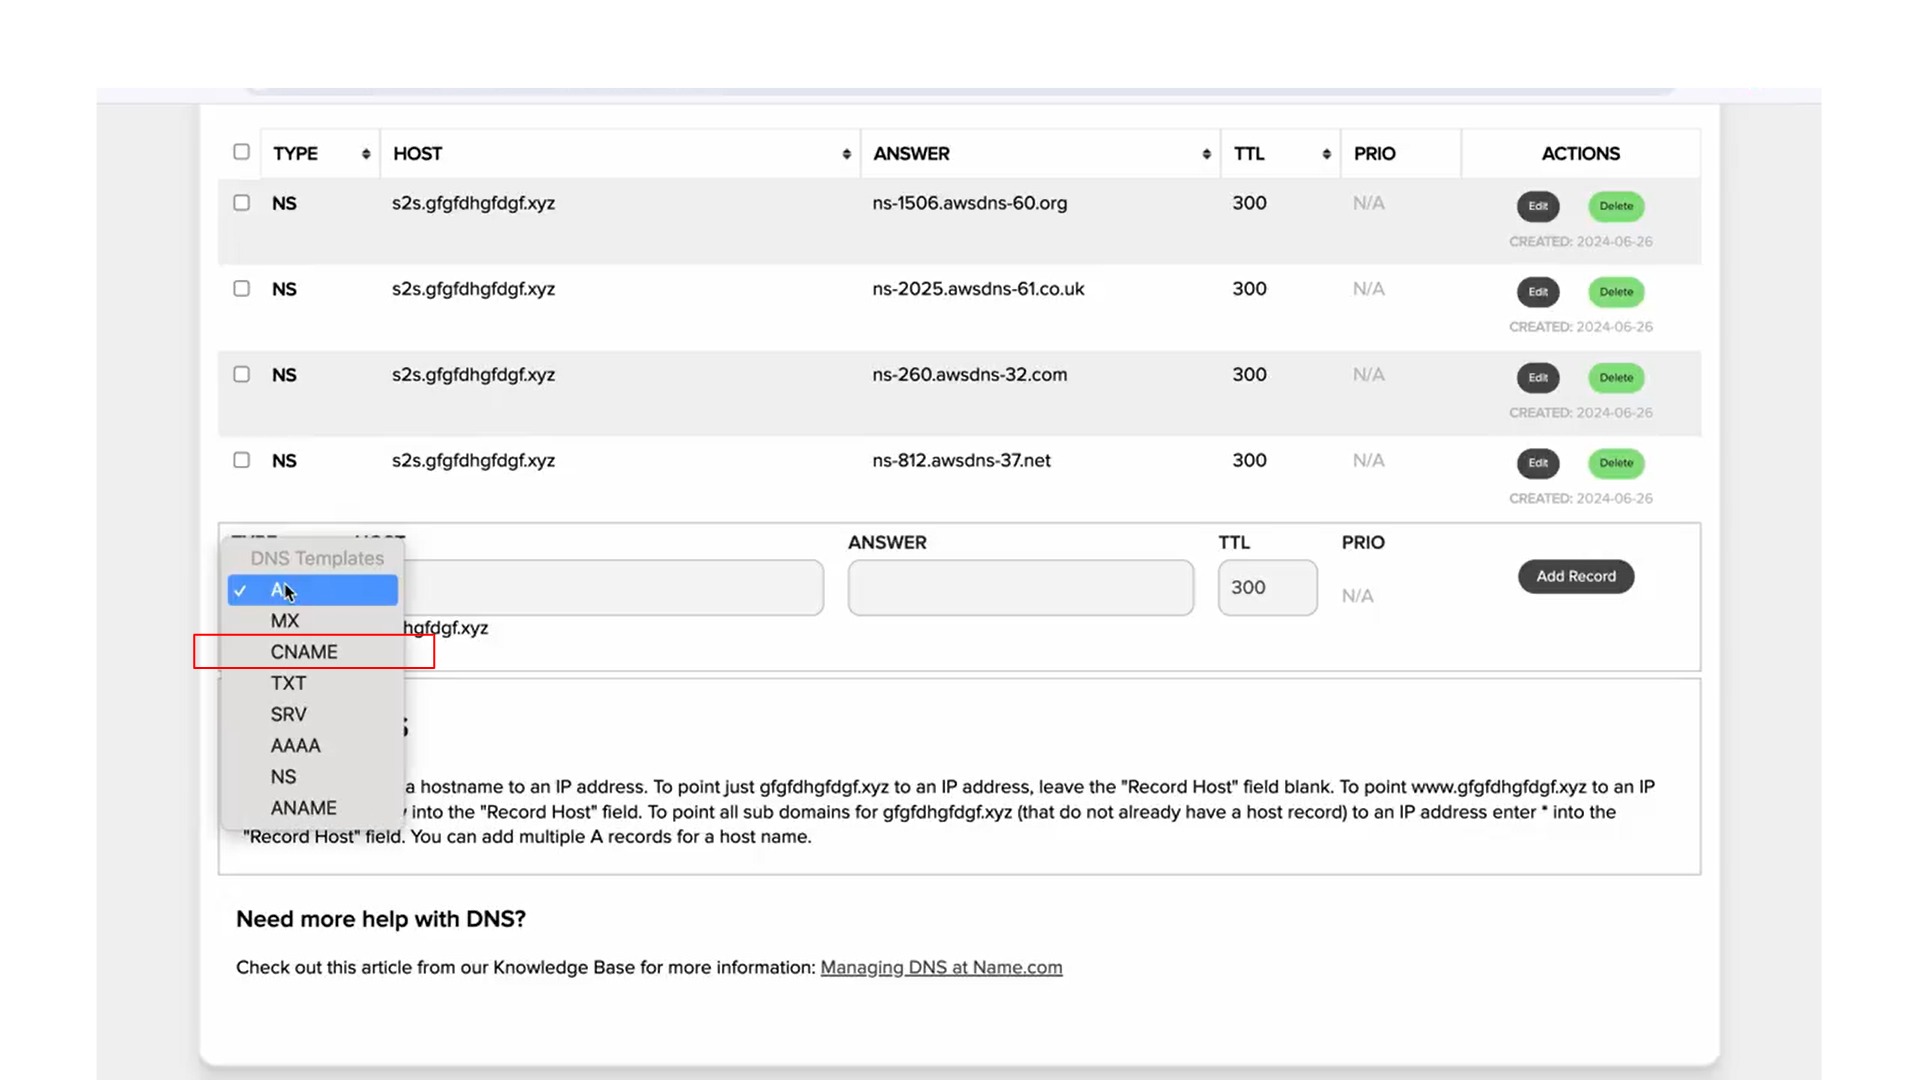
Step 5: Scroll down & choose the type as CNAME. Copy the CNAME record value shared by datahash and paste the same in the domain manager. Click on Add Record.

Related Articles
How to Add CNAME (DNS) records set-up on Joker.com DNS Manager
Step 1: Go to Joker.com and Login into the website with username and password Step 2: In the dashboard screen find the domain for which you want to add the NS record and click on it. This will take you to the domain’s settings page. Step 3: Scroll ...How to Add CNAME (DNS) records set-up on Domain.com DNS Manager
Step 1: Go to Domain.com & Login to your account Step 2: Select Domains from the left-side menu. Step 3: Click the SETTINGS option for the domain name where you will be updating the Records. Step 4: On the Domain information page, look for the ...How to Add CNAME (DNS) records set-up on Dynadot DNS Manager
CNAME Records Step 1: Go to Dynadot & login to your account Step 2: Click on Manage Domain in My Domains Step 3: Checkbox the domain where records are to be added. Click on Bulk action to open dropdown. Click on DNS settings Step 4: Click the ...Subdomain set-up for first-party data collection [DNS records set-up on Domain.com DNS Manager]
NS Records Step 1: Go to Domain.com & Login to your account Step 2: Select Domains from the left-side menu. Step 3: Click the SETTINGS option for the domain name where you will be updating the Records. Step 4: On the Domain information page, look for ...Subdomain set-up for first-party data collection [DNS records set-up on Domain.com DNS Manager]
NS Records Step 1: Go to Domain.com & Login to your account Step 2: Select Domains from the left-side menu. Step 3: Click the SETTINGS option for the domain name where you will be updating the Records. Step 4: On the Domain information page, look for ...